Herb spirals are a permaculture design that allow you to maximise your growing space and create a range of microclimates for herbs with different needs. As with many permaculture techniques, herb spirals mimic the natural environment – for example mounds of earth and hillsides, that allow seeds and plants to naturally find colonise the most suitable habitats.
In winter 2023, Amanda Groom from Bicester Harvest at Home was inspired to add a herb spriral to the delightful Grebe Road garden. This space was a children’s playground – now everyone is invited to the redeveloped space to spend time in nature, support local wildlife and learn about sustainable food growing.

1. Plan the location
The ideal location for a herb spiral is in an open plot on level ground, away from shrubs and trees that would shade the structure and compete with the herbs for water and nutrients.
If building one at home, locate it near your house, so that you can pop out quickly for fresh herbs. Also consider positioning it near a water source – spirals will need less water than individual pots, but watering is likely to be required in dry spells.

1. Mark out the spiral
Most herb spirals are around 1.5 to 2 metres in diameter and 0.6 to 1 metre tall in the centre. The planting space between sides should be around 30cm wide.
Mark out your spiral so that the lowest point is on the north side (assuming you live in the Northern hemisphere). You can use sticks to do this as pictured, or alternatively use flour or sand to show the spiral position.
2. Source your materials
If you are siting it on grass or weedy ground, use a layer of cardboard as a base – a common ‘no-dig’ gardening methodology.
At Grebe Road they used bricks, kindly provided by NJW Building Services to build their spiral. Depending on the chosen size you will need around 125-200 bricks.
You could use rocks or wood for a more natural look or a mixture of materials. Freegle and local sharing pages on social media are good places to ask for building supplies, as well as top soil, which is often given away.
You will often see ponds at the base of a herb spiral – this provides another ecosystem important in a permaculture garden, as well as providing a source of soil to fill the spiral.


3. Build the spiral
Position the first layer of your chosen material on the ground following your place markers. Then gradually build up the layers – the closer to the end you start your next layer, the steeper the spiral will become and the taller it will be in the centre. It might take a little trial and error to perfect your spiral with the number of bricks you have available.
There is no need to cement or secure the bricks in place; once complete the structure will be quite stable by design. As the bricks are touching on the inside of the spiral, there should be little loss of soil through the sides. As the plants grow, their roots will also help to stabilise the mound.
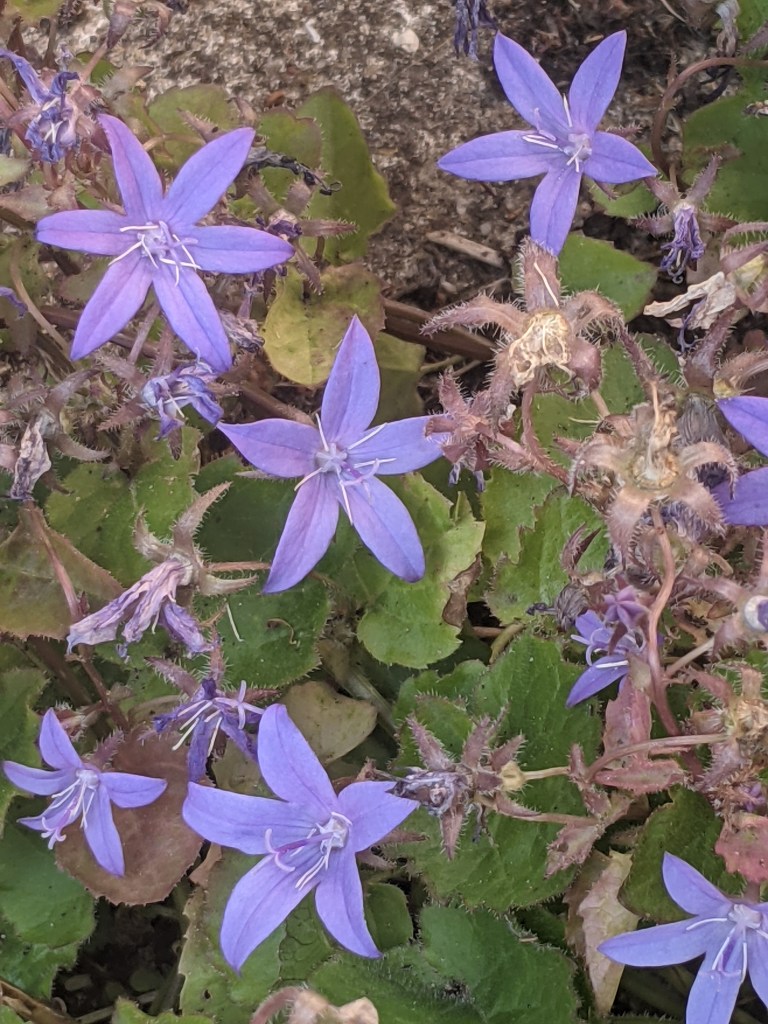
You will notice that although the bricks are touching on the inside, there will be gaps between them on the outside. These can be used as planting pockets for addiitional small herbs or other flowering plants like Mexican fleabane (below left, Erigeron karvinskianus) and trailing bellflower (below right, Campanula poscharskyana), which love to grow in small crevices. Edible flowers like calendular and nasturtiums would also work well amoung the herbs and will provide nectar and pollen for insects.

4. Fill with soil and compost
A 50:50 mixture of soil and organic matter like well-rotted manure or compost is ideal to fill the spiral. Harvest at Home sourced their compost from Happy Earth Soil, a local company who produce peat-free all-natural compost.
Including some additional stones or gravel at the base will help drainage. You can even vary the potting mix in different sections adding some grit or up to to 20% sand to the centre and south side and incorporating more organic matter to the north side. Fill to within about 3cm below the top and water well before planting.


5. Plant it up
Plant Mediterranean herbs rosemary, lavendar, thyme, marjoram and chamomile in the centre of the spiral; they will thrive in full sun and dryer soil.
Sage, organo and feverfew can tolerate slight shade from the plants higher up, so add those slightly further down. Coriander, dill, and basil need more moisture, but will enjoy a sunny position on the south face.
Towards the bottom of the spiral herbs like parsley and chives will benefit from the damper soil and shade on the north side.
Avoid lemon balm or any type of mint as they will take over and compete with the other herbs. Choosing dwarf varieties will allow space for more different types of herbs. Trailing and creeping varieties look attractive cascading over the bricks.
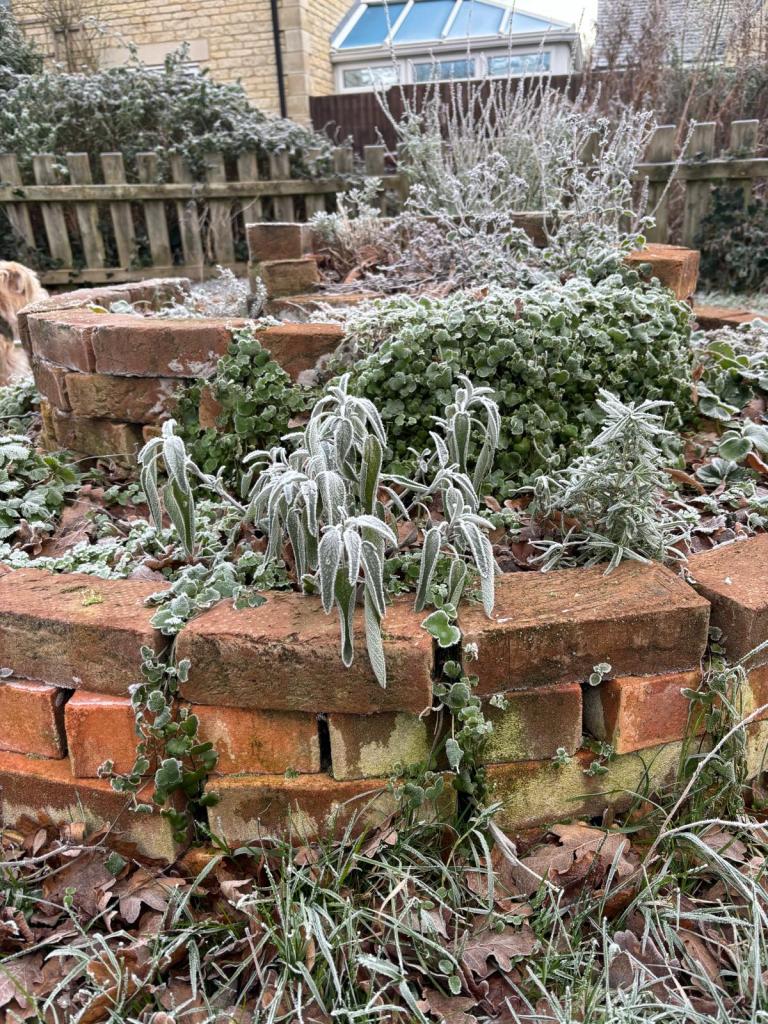
Winter interest
The photographs below taken in March 2025 illustrate that herb spirals make fantastic garden features, adding interest and structure throughout the year even in the depths of winter.
Adding a layer of compost mulch in early spring each year will keep your plants healthy and reduce weed growth.

To find out more about permaculture, read our blog ‘What is a forest garden?‘ or better still visit one of the Oxfordshire community gardens exploring these techniques. Grebe Road Garden, Marston Forest Garden, Bridge Street Community Garden in Banbury, Stonehill Community Garden near Abingdon and Oxford Forest Garden in Florence Park all welcome visitors and volunteers.
Many thanks to Amanda for sharing her experience and providing the wonderful photographs that bring this blog post to life. I will be counting the bricks I salvaged from an old barbeque to see whether I have enough to make a herb spiral this year. Do share your pictures in the comments if you have made one before – we would love to see it.
For more tips on avoiding food waste or growing your own food follow us on social media or sign up to our newsletter
